Ever panicked after realizing your favorite bakery is closing for the week, and there’s no way you can stock up on enough loaves to survive? Or encountered an unbeatable deal on a premium baguette you couldn’t pass up, only to realize you can’t possibly finish it before it hardens into an inedible rock? Don’t despair or let that bread go to waste! Our ultimate guide: “How to Freeze Bread: Top Methods for Perfect Preservation,” will swoop in to save your carbohydrates day. Prepare yourself to dive into the world of frozen baked goods and discover how easy it is to enjoy every bite at its freshest, no matter when the craving strikes. Extend your bread’s life far beyond its usual expiration date, preserving its delicious taste and prime texture even weeks later with our top tried-and-true methods. Fear stale bread no more!
There are several effective methods for freezing bread. One popular process involves wrapping the bread in two layers of plastic wrap and storing it in a resealable plastic freezer bag. Alternatively, sliced bread can be placed directly in the freezer, using the plastic bag the bread comes in. Regardless of your chosen method, remove as much air as possible before sealing or tying it shut to prevent freezer burn. When eating your frozen bread, let it defrost at room temperature until it is no longer ice cold. Refresh the bread loaf by reheating it in an oven preheated to 350 degrees Fahrenheit or toast slices after they reach a normal temperature.
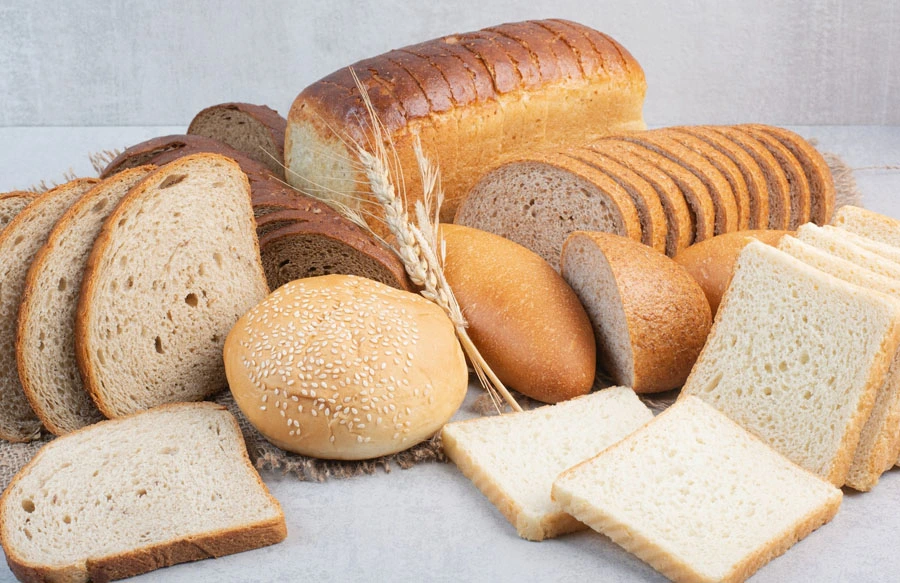
Steps to Freeze Bread Slices
Freezing bread is a fantastic way to extend its shelf life for days, weeks, or months. When freezing bread slices, you can follow a few simple steps to ensure the best results and maintain the bread’s quality.
Firstly, it’s advisable to slice the bread before freezing. This allows you to thaw only the number of slices you need at a given time rather than defrosting an entire loaf. Slice the bread using a serrated knife into your preferred thickness.

Next, prepare the slices for freezing by ensuring they are adequately protected. Place the slices in a plastic bag, removing as much air as possible before sealing or tying it shut. Alternatively, you can wrap all the pieces together in plastic wrap before placing them in a resealable plastic bag. This double-layered protection prevents freezer burn and helps maintain freshness.
It’s crucial to note that different types of bread may require other treatments before freezing. For example, crusty bread, like baguettes, may not freeze as well as whole-grain loaves. In such cases, wrapping them tightly in foil before placing them in a plastic bag can help preserve their texture.
Once you’ve taken these steps, it’s time to put the bread in the freezer. Make sure to place it in an area where it won’t get crushed or squished by other items. The optimal temperature for freezing bread is 0°F (-18°C) or below, so adjust your freezer settings accordingly.
Imagine coming home from a long day at work and craving some warm toast with melting butter on top. With frozen bread slices easily accessible in your freezer, you can pop them straight into the toaster and enjoy a quick and satisfying snack without hassle.
When it’s time to use the frozen bread, remove as many slices as needed and allow them to thaw at room temperature until they are no longer ice-cold. To refresh the loaf and enhance its taste, you can also consider reheating it in an oven preheated to 350 degrees Fahrenheit (175 degrees Celsius) for about 10 minutes.
It’s important to avoid refreezing bread after thawing, as this can affect its texture and quality. Instead, plan by freezing sliced portions that align with your consumption needs. By following these simple steps, you can enjoy the convenience of frozen bread slices whenever you desire without compromising on taste or texture.
Proper Setup and Techniques
Proper setup and techniques are crucial to ensure successful bread freezing and preserve its flavor and freshness. Let’s dive into some key considerations to keep in mind.
Firstly, it’s essential to choose the right wrapping material. For store-bought or homemade bread, encase the loaf in two layers of plastic wrap before storing it in a resealable plastic freezer bag. This double-layered protection helps prevent freezer burn and maintain optimal texture.
Imagine you’ve baked a delicious loaf of bread at home, like a soft brioche or a hearty whole-wheat. You slice it up and carefully wrap each slice with plastic wrap before arranging them in a freezer-safe container. As you seal the lid shut, you can’t help but feel satisfied knowing you’ve taken the necessary measures to preserve your creation.
Another important technique is to remove as much air as possible from the packaging before sealing it. Air can lead to freezer burn and affect the quality of the bread over time. Squeezing out excess air from the plastic bags or tightly wrapping slices with plastic wrap will help create a protective barrier.
Picture yourself placing freshly bought artisanal sourdough slices into individual plastic bags while expertly removing any excess air. As you zip each bag shut, you can’t help but marvel at your diligence in ensuring every slice is perfectly protected.
Finally, it’s essential to label the packaging with the freezing date. This way, you can track how long the bread has been in the freezer and ensure you consume it within recommended time frames.

You can optimize the preservation of your frozen bread slices by employing these proper setup techniques, such as double wrapping, removing air, and labeling. These extra steps may seem small, but play a significant role in maintaining the quality and taste of your stored bread.
Preserving Unbaked Bread through Freezing
Freezing bread in its unbaked state is convenient for those who love the aroma and taste of freshly baked bread. This method allows you always to have dough readily available, ready to be baked whenever you desire that warm, homemade goodness. Here’s how you can preserve unbaked bread through freezing.
Firstly, prepare your bread dough as usual, whether it’s a classic white loaf or a specialty bread with different ingredients. After kneading the dough and letting it rise for the recommended time, portion it into individual-sized pieces or divide it according to your preferred serving sizes. This step is crucial as freezing the whole batch may not yield satisfactory results upon thawing.
Next, wrap each portion tightly in plastic wrap. Ensure no air is trapped within the wrapping as this could lead to freezer burn or a compromised texture on your final baked goods. Double-layering the plastic wrap can provide an extra layer of protection against freezer burn and help maintain the quality of your dough during freezing.
After wrapping each portion, place them inside a resealable plastic freezer bag, squeezing out as much air as possible before sealing it shut. Combining individual wrapping and using a freezer bag helps prevent moisture loss and keeps the dough fresh for longer.

Imagine you want to bake a fresh loaf of bread every weekend but don’t have the time to make dough from scratch each time. By preparing multiple portions of unbaked dough in advance and freezing them using these methods, you can enjoy the convenience of having dough readily available whenever that irresistible craving strikes.
Now that we’ve covered preserving unbaked bread through freezing let’s move on to tips on wrapping and storing bread to ensure optimal preservation and freshness.
- The Food Safety and Inspection Service of the U.S. Department of Agriculture asserts that bread can be safely frozen for up to 3 months while maintaining its quality when properly stored.
- Research conducted by the Scandinavian Journal of Hospitality and Tourism in 2020 indicates that approximately 65% of households employ freezing to extend bread’s shelf life.
- According to a survey conducted by the Institution of Mechanical Engineers in 2019, almost 87% of consumers reported that their frozen home-baked or store-bought bread retained good taste and texture when properly defrosted.
Tips on Wrapping and Storing
Whether you have freshly baked loaves or store-bought varieties, properly wrapping and storing your bread is crucial for maintaining its quality and taste. Here are some tips to ensure your bread stays fresh during storage.
When it comes to freshly baked bread, cool it completely before wrapping or storing it. This helps prevent condensation, which can lead to sogginess or mold growth. Once cooled, avoid storing bread in the refrigerator, which can accelerate the staling process. Instead, opt for room-temperature storage in a dry location.
For store-bought or homemade bread you plan to freeze, follow the previously mentioned methods of wrapping individual slices or loaves tightly with plastic wrap. You can also use aluminum foil as an alternative; ensure it is tightly sealed to prevent contact with air.

Think of proper bread wrapping and storage, like putting on a warm winter coat before entering freezing temperatures. It offers protection against the elements and keeps you comfortable throughout your journey.
Additionally, consider using airtight containers designed specifically for bread storage. These containers help maintain optimal moisture levels, protecting the bread from drying out or becoming overly moist.
Remember to store your bread away from heat sources or direct sunlight, as these factors can impact its freshness and overall quality. A cool, dry pantry or cupboard is ideal for storing bread.
With these tips in mind, you can extend the shelf life of your bread and enjoy it at its best for longer periods.
- Properly wrapping and storing your bread is essential for maintaining its taste and quality. Avoid storing freshly baked bread in the refrigerator as it can accelerate the staling process, and instead, store it at room temperature in a dry location. Consider using airtight containers designed for bread storage to maintain optimal moisture levels. Store bread away from heat sources or direct sunlight in a cool, dry pantry or cupboard to extend its shelf life. By following these tips, you can enjoy your bread at its best for longer.
Dealing with Baked Bread Loaves
When it comes to freezing baked bread loaves, a few key considerations can ensure optimal preservation and quality when it’s time to defrost and consume. First and foremost, freezing bread is the best way to extend its life for days to months. Whether you have store-bought or homemade bread, proper wrapping and storage are crucial.
The freshest bread should be frozen, as it retains its taste and texture better than bread that has already dried out sitting on the counter. For store-bought and homemade bread, encase the loaf in two layers of plastic wrap to prevent moisture loss and freezer burn. Then, place the wrapped loaf in a resealable plastic freezer bag to provide an extra layer of protection against frost.
If you’re dealing with dairy- or egg-containing loaves, they can be wrapped in plastic wrap and frozen like simple breads. However, it’s important to note that these loaves are better used for preparations like bread pudding or stuffing when thawed.
Slicing bread before freezing allows you to thaw only what you need instead of defrosting the entire loaf. To freeze sliced bread, place the individual slices in a plastic bag, removing as much air as possible before sealing or tying shut. Alternatively, if you prefer keeping all the slices together, wrap them tightly in plastic wrap before placing them in a resealable plastic bag.
It’s worth mentioning that bread maintains its quality in the freezer for up to two months. However, beyond this timeframe, textural changes may occur, resulting in a less desirable eating experience. To determine if your frozen bread is still suitable for consumption, look out for large ice crystals inside the wrapping, as they indicate compromised texture or taste.
Defrosting a loaf of frozen bread involves taking it out of the freezer and allowing it to come to room temperature until it is no longer ice cold. Refresh the loaf by reheating it in an oven preheated to 350 degrees Fahrenheit. The reheating process should restore its crustiness and warmth, making it seem freshly baked. For individual slices, simply toast them once they reach a normal temperature.
One important point to note is that refreezing bread should be avoided whenever possible. Each time bread is frozen and thawed, it undergoes changes in texture and quality, so it’s best to only freeze what you can consume within a reasonable timeframe.
Now that we’ve covered the essentials of dealing with baked bread loaves, let’s explore the division, preparation, and sealing methods that will ensure your frozen bread stays fresh and delicious.
Division, Preparation and Sealing
Before freezing your bread, it’s recommended to divide it into portions that suit your needs. This way, you can defrost only what you require for a single serving or meal instead of having to thaw a whole loaf every time. Whether you prefer slicing the bread or separating it into smaller rolls, dividing it prior to freezing provides greater convenience.
Once divided, it’s crucial to prepare your bread for freezing properly. To prevent excess moisture loss and freezer burn, wrap each portion or slice individually in plastic wrap. This will create a protective barrier against air and ice crystals. Wrapping each piece tightly ensures minimal exposure to the cold environment of the freezer.
Sealing is just as important as wrapping when it comes to preserving the quality of your frozen bread. Placing the wrapped portions in resealable plastic freezer bags helps maintain freshness while providing an extra layer of protection against temperature fluctuations and potential contamination from other items in the freezer.
Remember to label each bag with the date of freezing to keep track of how long each portion has been stored. This allows you to prioritize consuming older portions first before moving on to newer ones.
By effectively dividing, preparing, and sealing your bread before freezing, you can extend its shelf life and ensure that each serving remains as delicious as the day it was baked.
Safely Defrosting and Using Frozen Bread
So, you’ve successfully frozen your bread for future use. Now comes the exciting part: safely defrosting and using the frozen bread to enjoy its deliciousness once again. Let’s explore some tried and tested methods that will help you make the most of your frozen loaves.
One of the simplest ways to defrost frozen bread is by leaving it at room temperature. Take the wrapped bread out of the freezer and place it on the countertop. Allow it to thaw naturally until it is no longer ice-cold. Depending on the size of the loaf, this process can take a few hours or overnight.
Another popular method is to refresh the loaf by reheating it in an oven preheated to 350 degrees Fahrenheit (175 degrees Celsius). Remove the plastic wrapping, place the bread on a baking sheet, and warm it up for about 10-15 minutes until it becomes crispy on the outside and soft on the inside.
If you prefer toasted slices, there’s no need to defrost the entire loaf. Simply take out individual slices from the freezer, pop them in a toaster or toaster oven, and toast them until they reach your desired level of crispiness.
Remember, when defrosting bread, it’s important not to refreeze it once it has been fully thawed. Refreezing can affect its quality and texture.
Now that you know how to defrost frozen bread effectively, let’s dive into some wonderful ways to use it once it has been brought back to life. Frozen bread can be an incredibly versatile ingredient in various dishes and meals.
Have some leftover frozen baguette? Slice it up and turn it into homemade garlic bread or croutons for soups and salads. You can also transform thawed slices into delectable French toast or an indulgent grilled cheese sandwich. The possibilities are endless!
For those who enjoy baking, using frozen bread to make bread pudding or stuffing is a fantastic option. The slightly drier texture of the thawed bread helps absorb flavors and moisture, resulting in a delicious dish.
Whether you’re using the defrosted bread as is or incorporating it into mouthwatering recipes, one thing is for certain – freezing bread allows you to enjoy its goodness even when it would have otherwise gone to waste.
Freezing bread not only helps extend its shelf life but also ensures that you always have access to fresh and delicious slices whenever you desire. With proper defrosting techniques and a bit of creativity, there’s no limit to how you can savor and utilize your frozen bread. So go ahead, freeze your loaves with confidence and enjoy the convenience and satisfaction it brings.